


Add Products To Your Catalog
To create a product manually, you need to specify its details using a special section in your store's back end. Of all the product details, only the product name is required. The rest of the product details can be configured later on.
1. In your store’s Admin area, go to the products listing page (Catalog > Products)
2. Click the Add product button
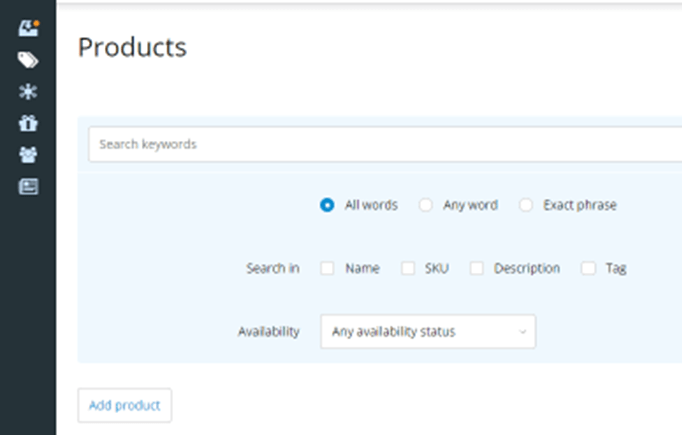
3. Use the fields on the “Add product” page to provide information about the product

The page contains many fields, but you do not have to set all of them right away. The only required field is the Product name.
4. To save the product information you have provided, click Add product at the bottom of the page. The new product will be saved.
5 .When ready to submit your product for approval, Fuel2Electric team will review all the fields regarding information consistency. This is required for comparison tool and search engine optimization.
Detailed explanation of all product page fields
6. General Information
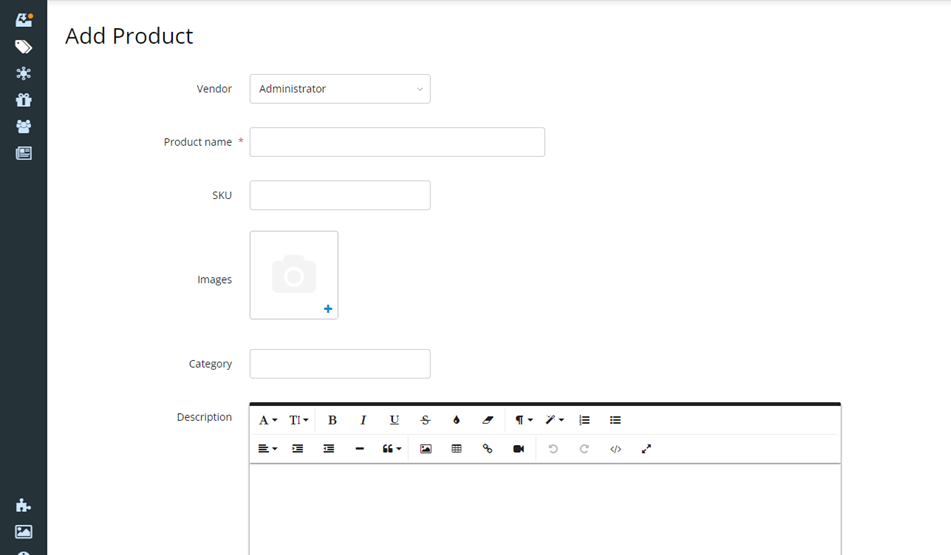
- Vendor: Company name, default
- Product name: The name by which you and your customers will identify this product.
- SKU: The product SKU (A code that will serve as a unique identifier for this product). If you leave this field blank, an SKU will automatically be generated when you save the product.
- Images: Use this section to add images for the product.
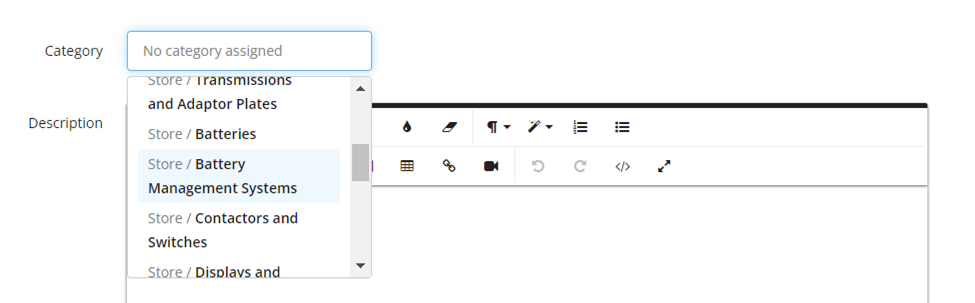
- Category: The category (or categories) to which this product belongs.
- Description: A short product description that displays on product list pages.
- Full description: A longer product description that displays on the product details page.
- Allow buyers to attach files to this product: Use this toggle to allow customers to attach files during shopping.
- Tags: Use this field to assign tags defined by Fuel2Electric. By default the tag “NEW” will be displayed on your product for 30 days.
- Available for sale: This toggle defines whether the product displays on the storefront. Uncheck this option to temporarily remove the product from the storefront (Store visitors will not be able to see it).
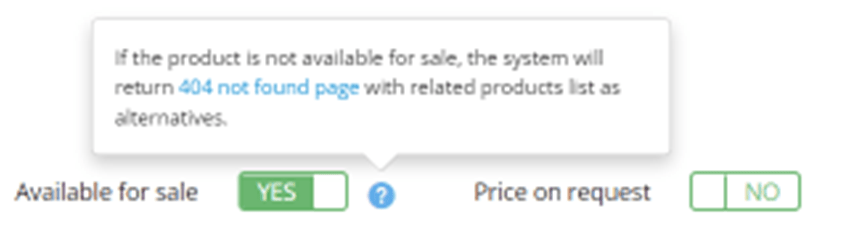
- Price on request: Using this field, you can hide from viewers the price and the "Add to cart" button for the current product. Instead, the store visitors will see the “Get a quote” button. Request for Quotes and Quotes are sent through the platform.
7. Services & projects
- Service: This toggle converts the current product into a Service. Services are not displayed in the store. They are available in the “My Services” menu and can only be added to proposals. See the FAQ for more details or contact us admin@fuel2electric.com.

- Project application, for Fuel2Electric’s administrator only.
8. Prices & Inventory
- Membership: must remain empty
- Tax class: The tax class to which the product belongs (Defines what taxes should apply to the product). Contact us for exemption admin@fuel2electric.com.
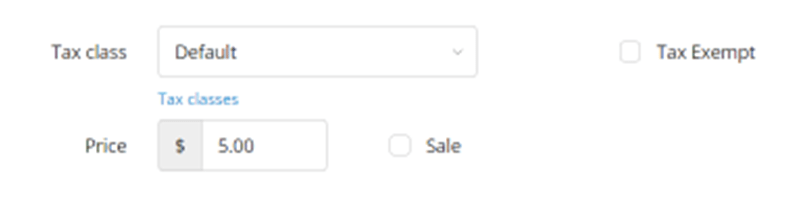
- Price: The product price.
- Sale: Use this field to put the product on sale. After enabling the "Sale" option, you will be able to specify either a sale price for the product (expressed in the store currency) or a discount (expressed as a percentage of the product base price).
- Apply product-specific discount to wholesale price: No wholesale prices. Contact us for more details admin@fuel2electric.com
- Global discounts: Contact us for more details admin@fuel2electric.com
- Arrival date: For logistics information, this field allows you to specify the date when the product is or will be available in your store.
- Inventory tracking: This toggle enables the inventory tracking feature for a product. The inventory tracking feature allows specifying the number of product units you have on hand initially (using the "Quantity in stock" field; see below). Your Fuel2Electric store will then track all purchases of the product. Every time someone buys that product, the number in "Quantity in stock" field will be reduced automatically by the number of units that have been purchased. If you have a stock refill, just edit the amount in "Quantity in stock" field, thus adjusting inventory level. If the product quantity is unlimited and does not need tracking, the "Inventory tracking" toggle can be disabled.
- Quantity in stock: Use this field to set the inventory level (the number of product units in stock). The value specified in this field is used for the "Inventory tracking" feature.
9. Shipping
- Weight: Product weight. If the product requires shipping, this setting may affect shipping cost calculation.
- Requires shipping: Whether this product requires shipping. This setting affects the calculation of order shipping costs. (If the product does not require shipping, the shipping cost will not be calculated).
- Free shipping: A product is shipped for free if all products in the shopping cart are either eligible for free shipping or excluded from the shipping calculation.
- Exclude from shipping cost calculation: This product's shipping fee will not be counted in the order total.
- Separate box: This toggle defines whether the product needs to be shipped separately from other products. If a separate shipping box is required, you can specify the box dimensions and the maximum number of product units that fit in this box. Shipping will then be calculated appropriately.
10. Marketing
For Fuel2Electric use only
11. Attributes / Global
Attributes are useful for filters, comparison tool and search engine. For most of the categories we created attributes.
For example, for batteries we ask vendors to detail information such as:
- Capacity (kWh)
- Nominal Voltage (V)
- Density (Wh/lb),
- etc.
Another example, for motors we ask vendors to detail information such as:
- Efficiency Peak (%)
- Nominal Voltage (V)
- Current (A)
- etc.
12. Attributes / Product-Specific
Product-specific attributes are properties that distinguish a particular product from the rest in your store and are, therefore, configured on the level of that specific product.
The "Add attribute" drop-down will give you a choice of three types of attribute value fields:
- Plain field
- Textarea
- Yes/No
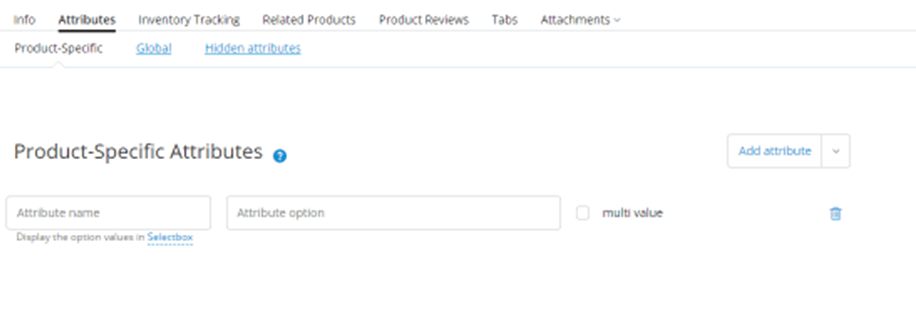
Use the newly-added field to specify your attribute's name and value(s).
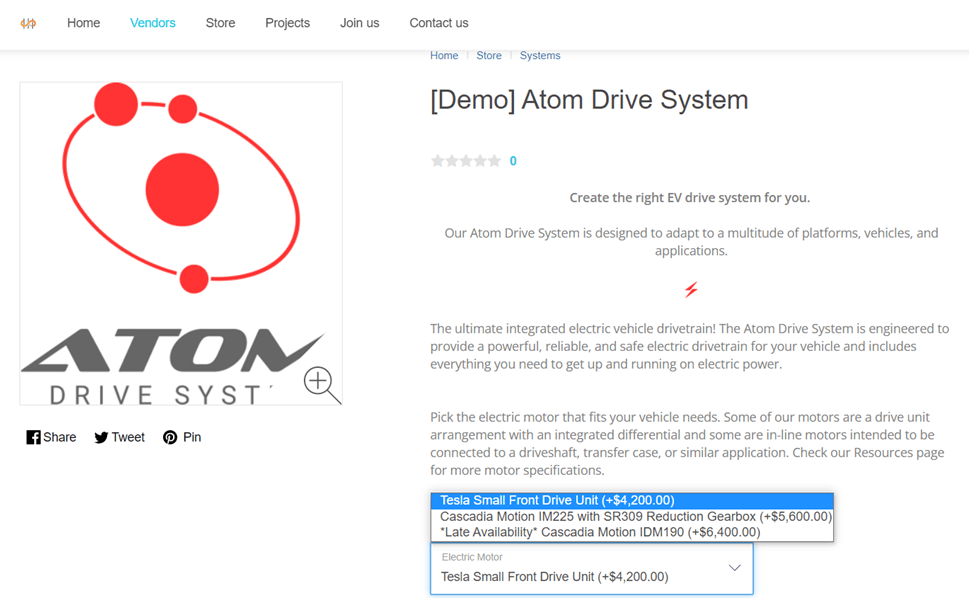
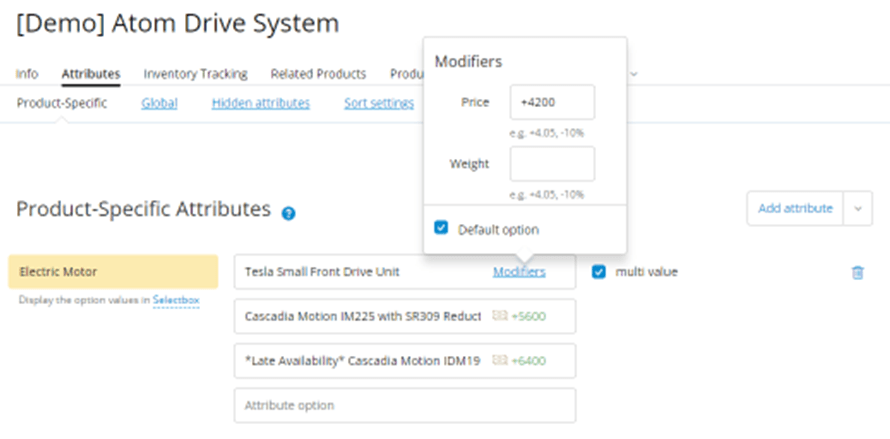
For example, for an EV conversion System, we will create the multi-value attribute "Electric motor":
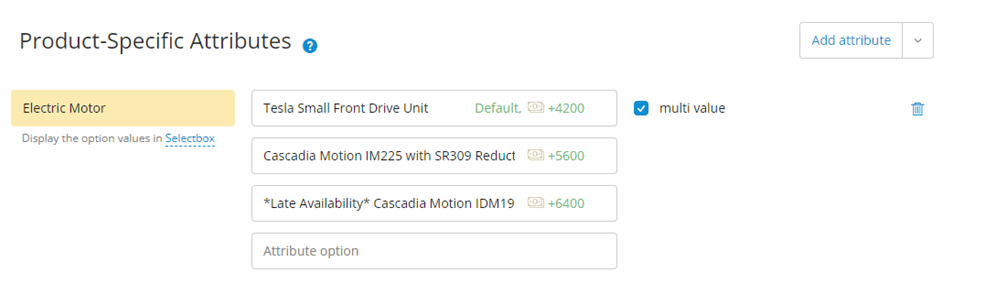
Click "Save changes." The attribute will be assigned to the product.
Now, if you check the "Specification" tab on the product details page, you will be able to see the attributes you have added there along with the product SKU that is present by default:
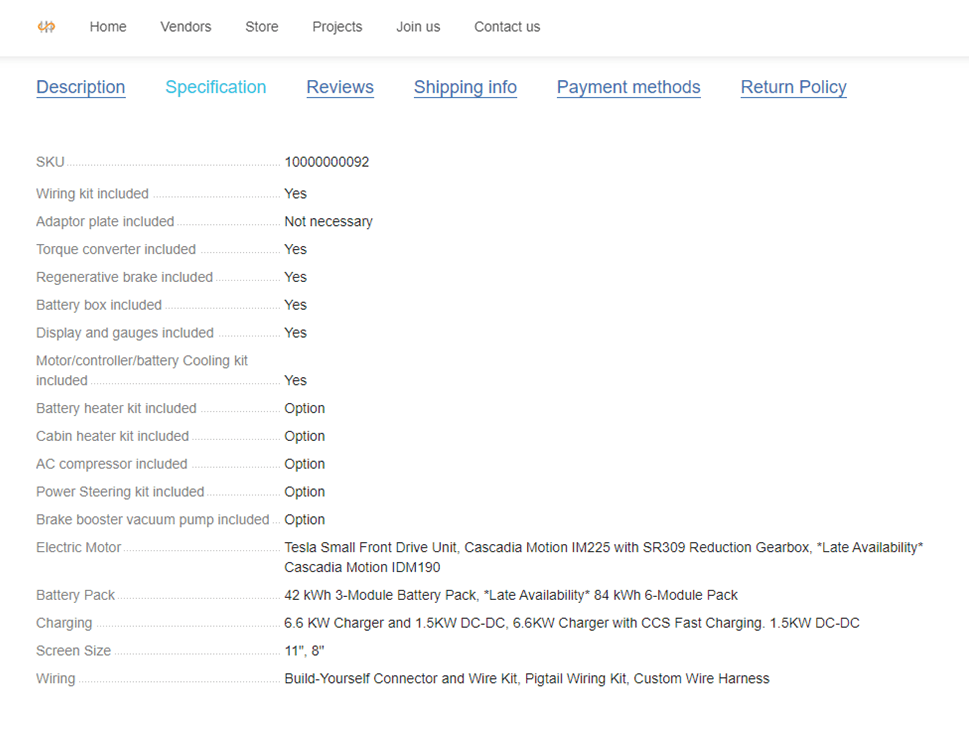
And because it’s a multi value attribute, the attribute options: “Tesla…”, “Cascadia…”, and “*Late availability* Cascadia…” have become product options that buyers can choose from before adding a product to the cart. Product options arranged this way display as a select drop-down.
13. Setting the Attribute Values
When configuring multi-value attributes, you can control which attribute values should be shown to customers by default, weight and price difference (in value or percentage).
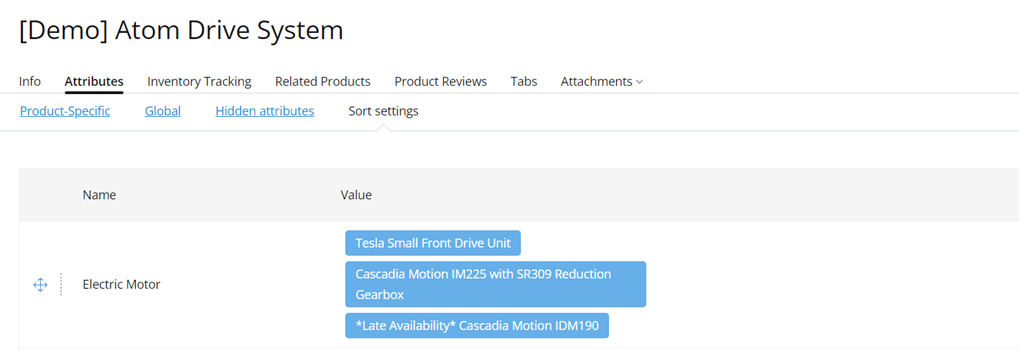
14. Sorting Multi-Value Attributes
If a product has a multi-value attribute, you may need to change the order of appearance for the options on the storefront's product details page. Simply drag and drop.
How to
- Configure My Profile Page
- Configure Payment Methods
- Configure Shipping Methods
- Add Products To Your Catalog
- Submit Proposal
